


Deploying The Tanium Client Using Microsoft Endpoint Manager (Intune)
One of the things that our clients often need are a few different ways of distributing endpoint management agents, such as Intune. The modern workplace isn’t just about having devices which are all neatly lined up on desks in a few office locations and connected to wire networking and so when you’re got devices literally anywhere in the world; how do you deploy software to them?
This guide will demonstrate how to deploy the Tanium agent onto the machines that are currently being managed in your Microsoft Endpoint Manager (Intune) environment. The nifty thing is that if you have a Tanium Zone Server configured as well, the clients will be able to register with the core infrastructure through that and you’ll have full manageability via Tanium as soon as the agent is deployed.
So to get started, you will need the following:
- Access to your Intune management interface
- The tanium-init.dat for your Tanium install
- The Tanium setup executable (SetupClient.exe)
- The InTuneAppUtil.exe (https://github.com/Microsoft/Microsoft-Win32-Content-Prep-Tool)
Note: The tanium-init.dat and SetupClient.exe can be downloaded from your Tanium management interface.
Our Guide:
We are going to bundle the Tanium init.dat file with the Tanium client installer. This is what would be used for installations of Tanium using the 7.4 or later agents. For anyone using the 7.2 or earlier agent, you’ll need to grab your tanium.pub certificate file.
- Create a new folder, on your local machine, called Tanium with a folder inside it called TaniumInstaller.

- Place the InTuneAppUtil.exe in the folder called Tanium and the tanium-init.dat along with the SetupClient.exe in the TaniumInstaller folder.

- Open a new PowerShell, as Admin and browse to the Tanium folder. Open the folder and run the IntuneWinAppUtil.exe file.
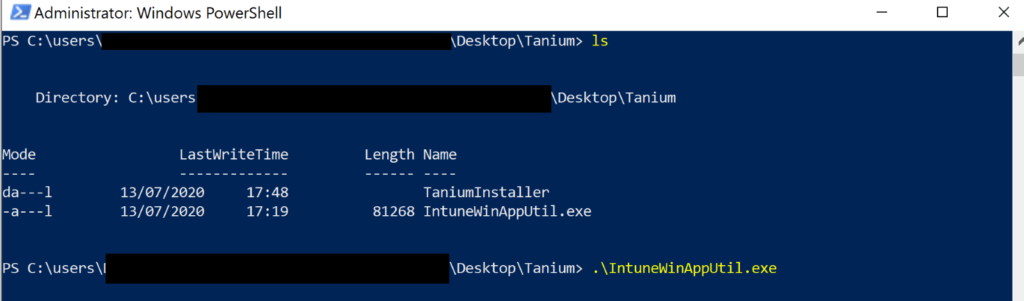
- When the command has been run, the program will prompt for some input on file locations. If you have created the folder structure as outlined in step 1, you can use the same variables in the screenshot below, otherwise change them to reflect your setup.

- The program will take a few seconds to bundle up the applications; a new .intunewin file will be present in the TaniumInstaller directory.

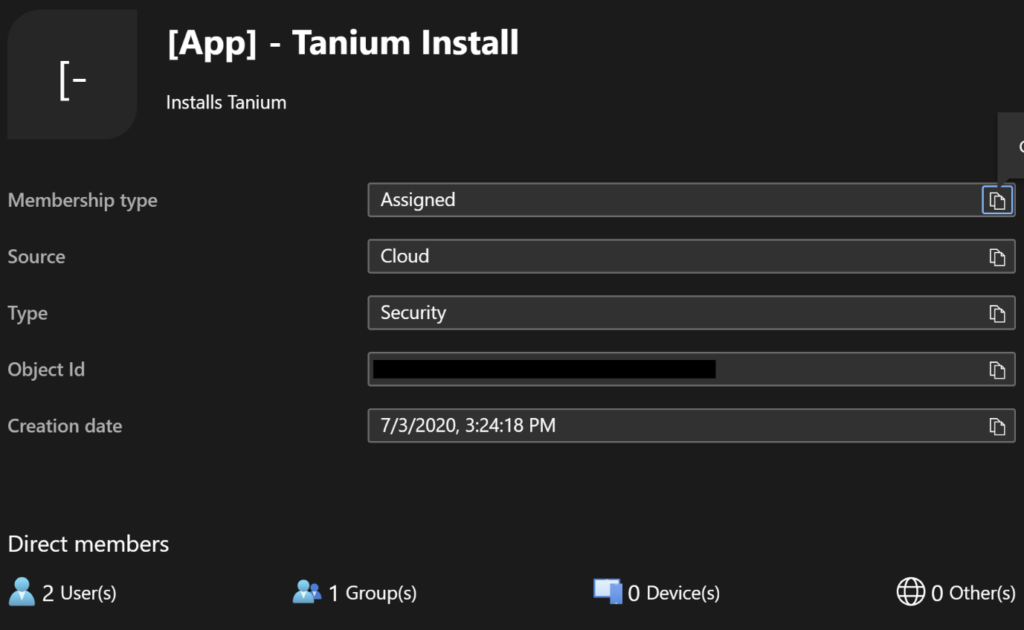
- Log into your Azure interface and create a new group in Azure Active Directory to whom this installer will be deployed to. We would recommend only adding in test users at this moment to ensure the deployment is successful.
- Now we need to upload the application to Microsoft Endpoint Manager (InTune) for deployment.
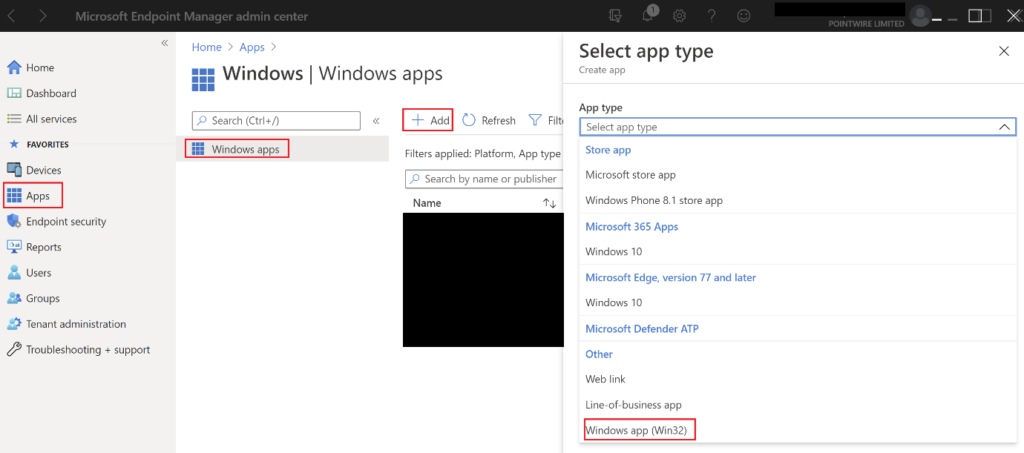
- Select Apps, Windows Apps and press the Add option. When the Select app type menu opens on the right, select Windows app (Win32).
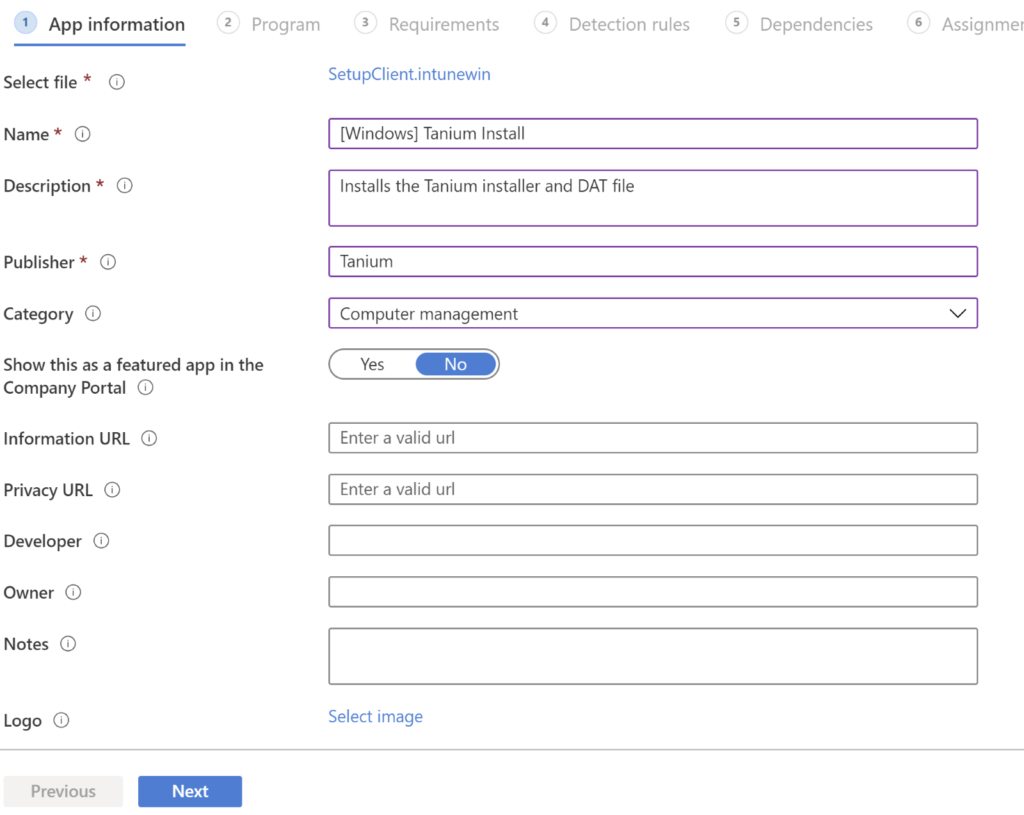
- Press the blue hyperlink to select your newly created file from step 5; this will be called SetupClient.intunewin if the same naming contention as this guide was used.
- Give the application a meaningful name and description, then press Next to continue.
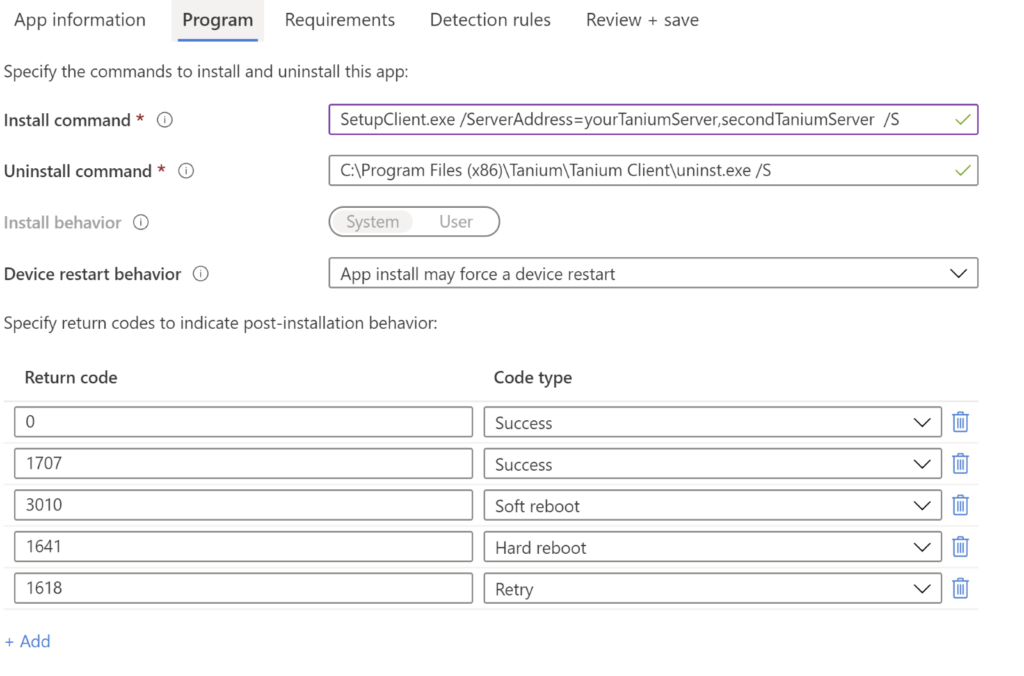
- For the installation command use the string seen below, if there is only one Tanium server remove the comma and second server reference. The path to the DAT file is not needed as it is bundled in the same intunewin file. Remember at this point to include the internal server names as well as the Zone Server(s) you’re using too.
SetupClient.exe /ServerAddress=yourTaniumServer,secondTaniumServer /S - The uninstall command should be as: C:\Program Files (x86)\Tanium\Tanium Client\uninst.exe /S
- The other options on this page can be left as default.
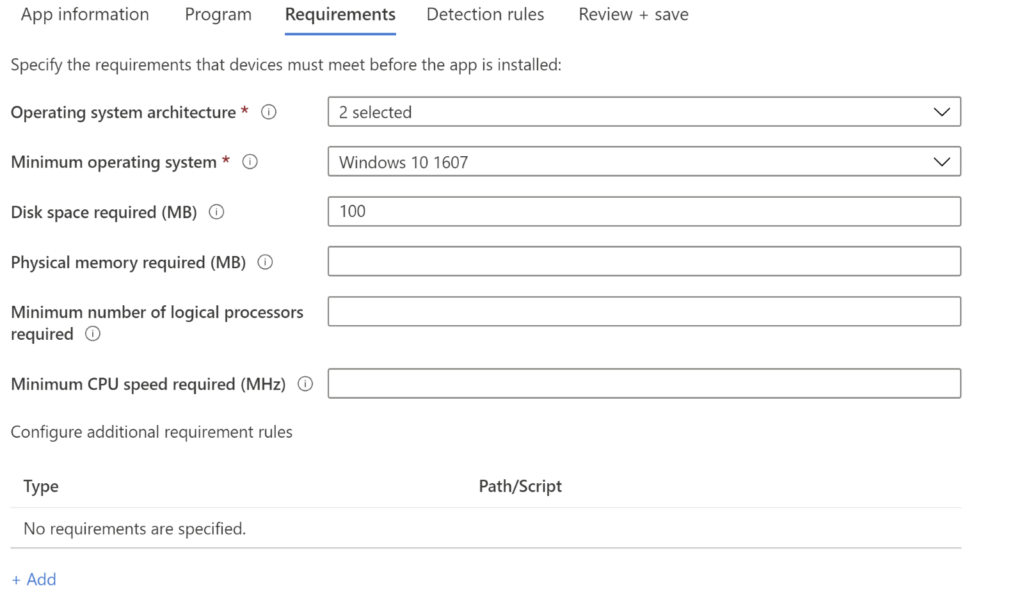
- On the Requirements page, set operating system architecture to 32 and 64 bit. Set the minimum operating system to your designed level. We would recommend setting this to Windows 10 1607.
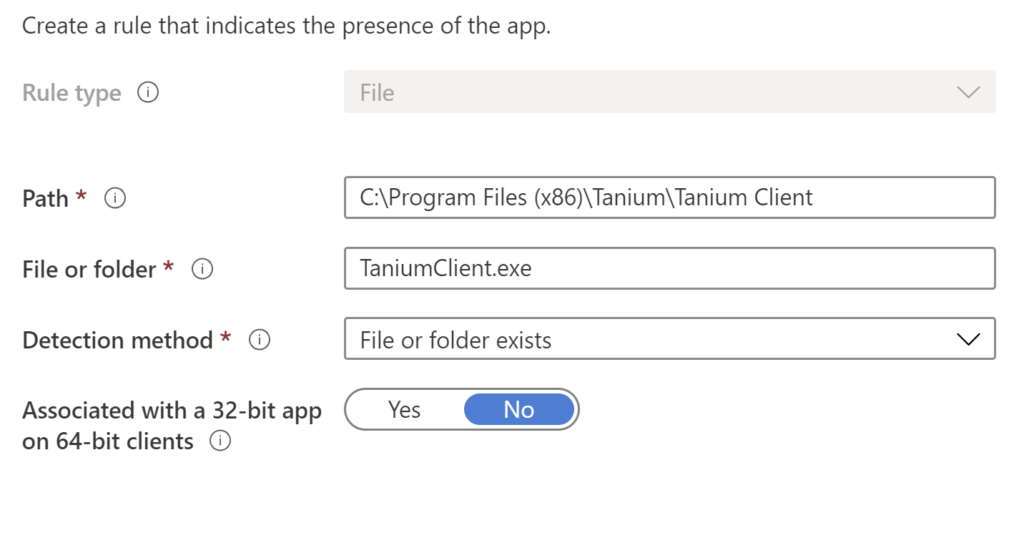
- For Detection rules set Manually configure detection rules with the following settings:
- Path: C:\Program Files (x86)\Tanium\Tanium Client
- File or Folder: TaniumClient.exe
- Detection Method: File or folder exists
- Associated with a 32-bit app on 54 bit clients: No
- To ensure that the Tanium client will be downloaded to your Group, set it as Included in the Required section. This will push down the application and install it to all users of this group.
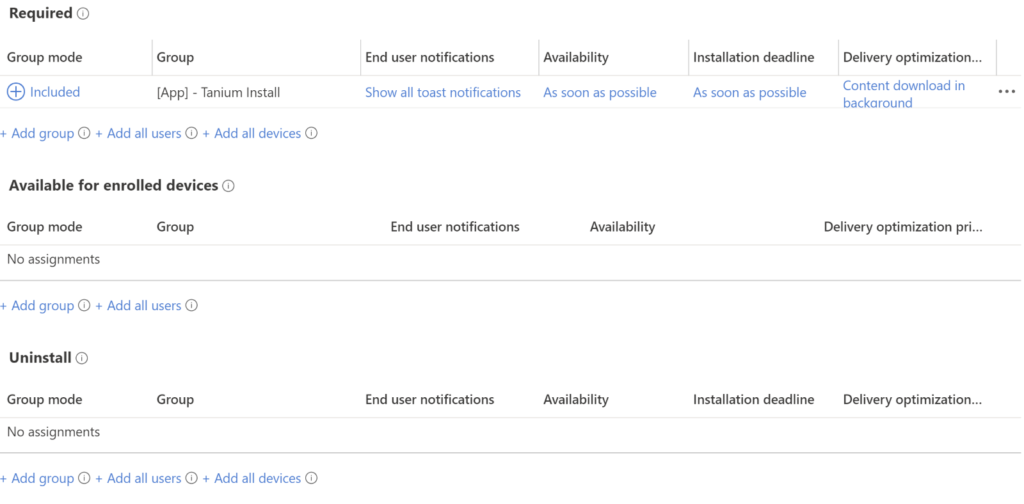
- Complete the wizard, Tanium will be downloaded and installed to the users in the assigned group.
And Voila!
That’s it! Now it’s just a question of ensuring that the devices are managed in MDM and keeping an eye on the deployment. It’s worth checking in the Administration > System Status menu in Tanium to see which devices have registered, but remember that you can also set alerts in Discover for New Managed Interfaces too.
Contact us for more information on how our team at PointWire can support your business and assist you in deploying the tanium client using Microsoft Endpoint Manager (Intune).